Configure an SSO Identity Provider
This guide walks through setting up SAML 2.0 Single Sign-On (SSO) for attendee portal authentication. After completing it, attendees will be able to log in to your event portal using credentials managed by your organization's identity provider (IdP) — such as Okta, Azure AD, Auth0, Ping Identity, or any other SAML 2.0-compliant service.
How It Works
GXP acts as the Service Provider (SP). Your organization's identity system (e.g., Okta, Azure AD) acts as the Identity Provider (IdP). The two exchange metadata to establish a trust relationship.
The setup has two phases:
- Create an SSO Provider in GXP — this generates your SP metadata, which you share with your IdP.
- Attach the provider to a portal — this tells attendees' portal login screen to offer SSO as an option.
You'll need:
- Team Admin access in GXP
- Credentials from your identity provider: Entity ID, SSO URL, and an X.509 certificate — or the ability to fetch GXP's SP metadata and configure the IdP first, then return to complete the GXP side.
Part 1 — Create the SSO Provider
SSO providers are configured at the Team level and can be reused across multiple projects.
Step 1: Open Team Settings
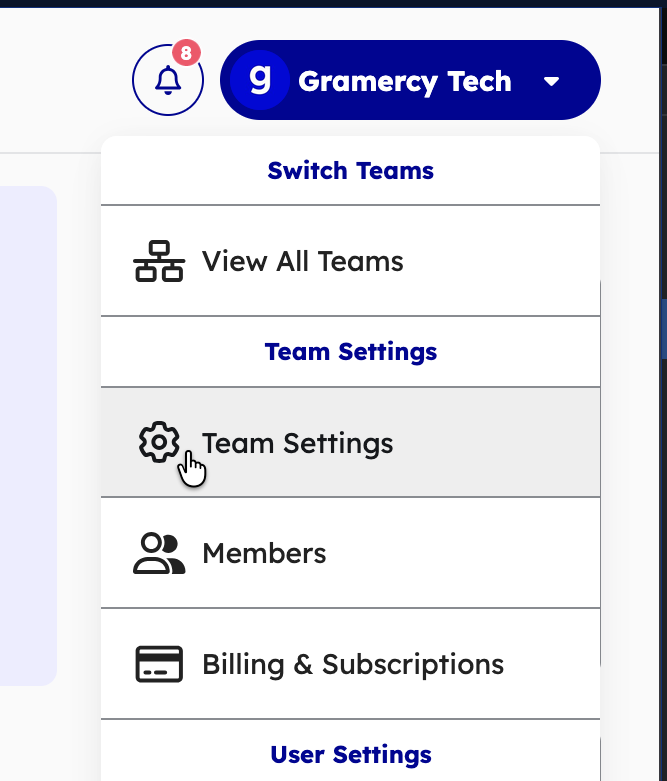
From the main navigation, click your team name or the gear icon to open Team Settings.
Step 2: Go to the SSO Providers Tab
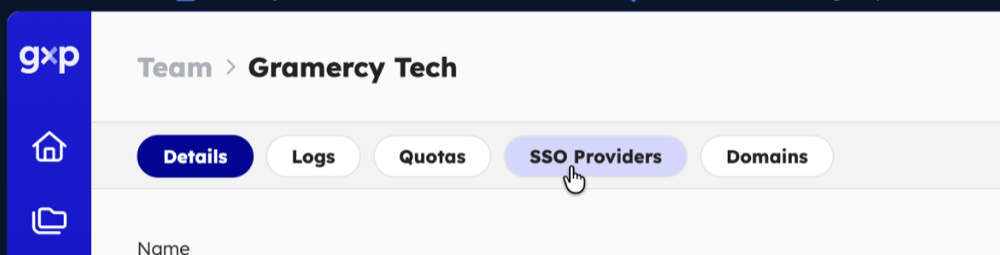
Inside Team Settings, select the SSO Providers tab. This lists all SSO configurations for your team.
Step 3: Create a New Configuration
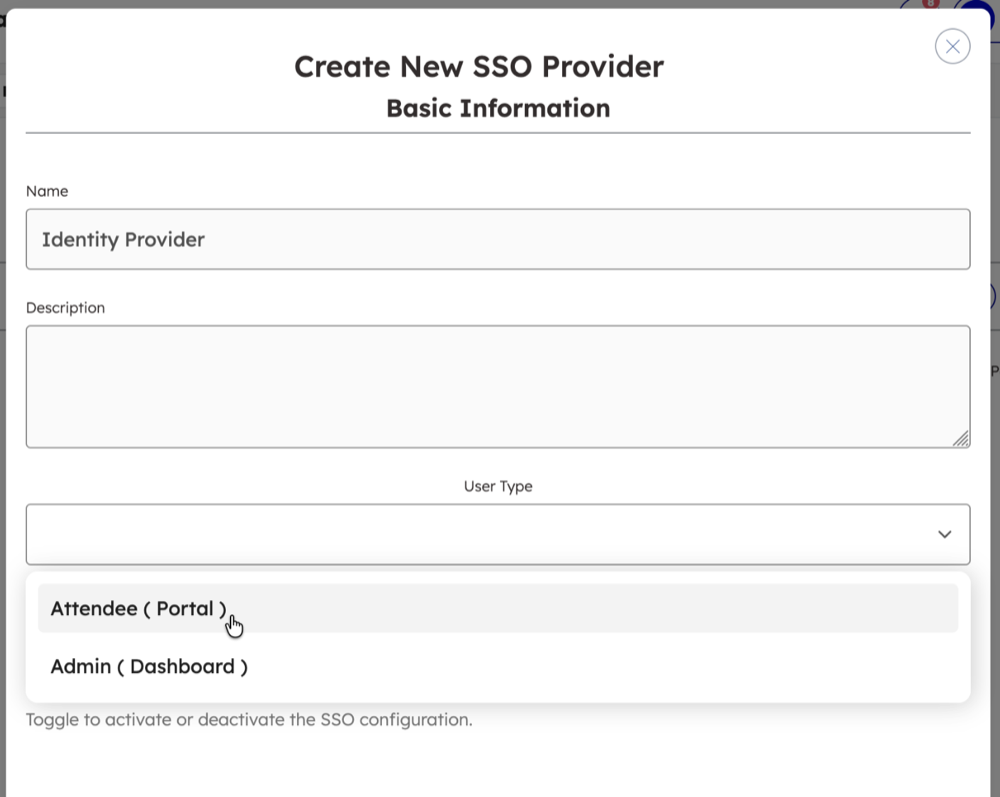
Click the + (plus) icon to open the new SSO configuration form.
Fill in the fields:
| Field | Required | Description |
|---|---|---|
| Name | Yes | An internal label for this configuration (e.g., Okta - Conference 2025). Not shown to attendees. |
| Description | No | Optional notes about this provider. |
| User Type | Yes | Set to Attendee (Portal). This scopes the SSO config to portal attendee logins. |
| IdP Entity ID | Yes* | The unique identifier for your identity provider. Provided by your IdP administrator. |
| SSO URL | Yes* | The IdP's SAML login endpoint URL. |
| IdP Certificate | Yes* | The X.509 public certificate from your IdP, used to verify SAML assertions. |
| Login Button Text | Yes | The label shown on the portal login button, e.g., Sign in with Okta or Login with SSO. |
*These fields can be left blank and filled in later if you need to retrieve GXP's SP metadata first (see Part 2).
Click Create to save the initial configuration.
Part 2 — Retrieve Your Service Provider Metadata
Once the provider is created, GXP generates SP metadata that your identity provider needs to establish trust.
Step 4: Open the Configuration Details
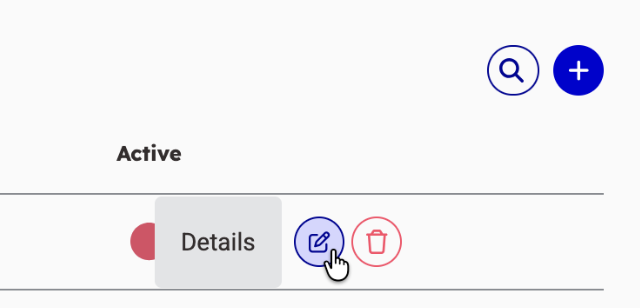
In the SSO Providers list, click the Details button on the row for the configuration you just created. This opens the provider's configuration panel in a new tab.
Step 5: Locate the SP Configuration Section
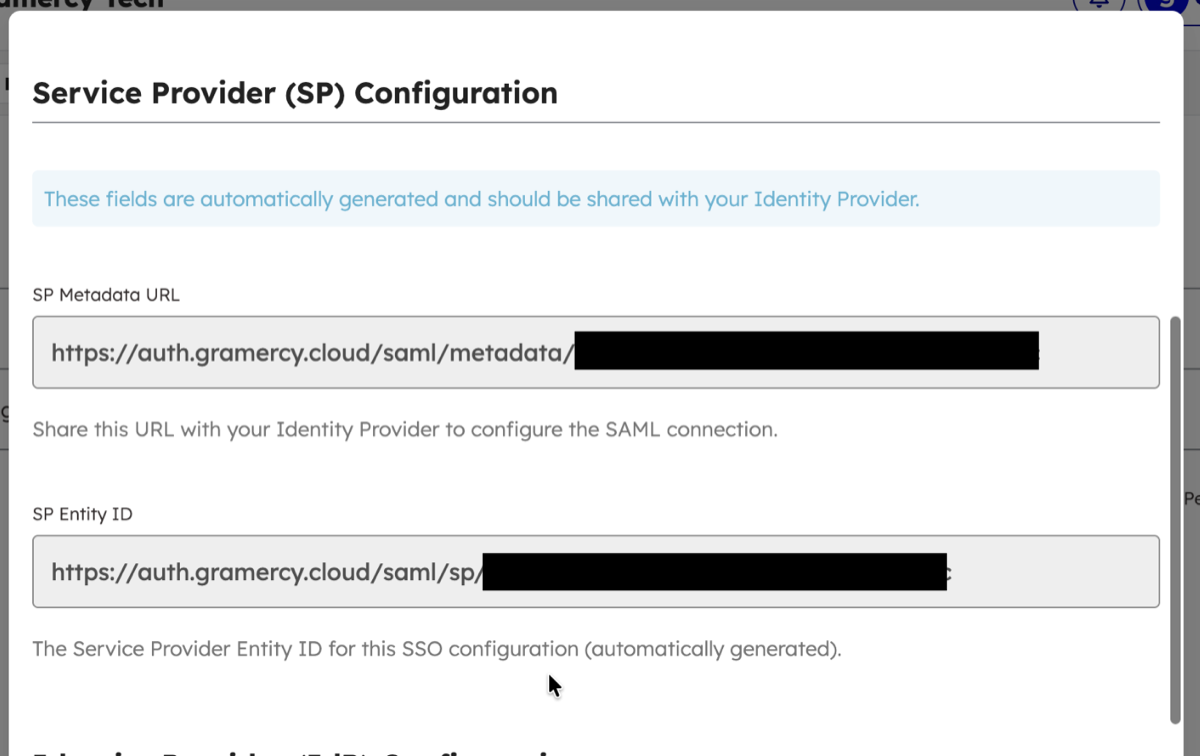
Scroll down to the Service Provider (SP) Configuration section. You'll find:
- SP Entity ID — GXP's unique identifier, used as the "Audience URI" or "Entity ID" in your IdP.
- Metadata URL — serves GXP's full SP metadata XML file. Share this with your IdP for automatic configuration.
The metadata file includes the ACS URL (where the IdP posts SAML responses), the SLO URL (single logout endpoint), and GXP's SP certificate.
Step 6: Configure Your Identity Provider
Take the SP metadata values to your IdP and register GXP as a new SAML application. The exact steps depend on your provider, but you'll generally:
- Create a new SAML 2.0 application or integration in your IdP admin console
- Enter the SP Entity ID as the Audience URI / Entity ID
- Enter the ACS URL as the reply URL / callback URL
- Optionally provide the Metadata URL — many IdPs can auto-import all settings from this URL
Once the IdP application is created, copy the IdP Entity ID, SSO URL, and IdP Certificate back into GXP (next step).
Part 3 — Complete and Activate the Configuration
Step 7: Enter the IdP Credentials
If you skipped the IdP fields earlier, return to the SSO provider configuration (Details → edit) and fill in:
- IdP Entity ID
- SSO URL
- IdP Certificate
These values come from your identity provider's application settings page.
Step 8: Activate the Configuration
Before saving, make sure the Active toggle is enabled. The configuration must be marked active to appear as an option when connecting it to a portal.
Click Save.
If the configuration is saved without the Active toggle enabled, it will not be available in the portal authentication setup in Part 4.
Part 4 — Add SSO to a Portal
With the SSO provider configured, you now attach it to the event portal where attendees will log in.
Step 9: Navigate to Your Project's Portals
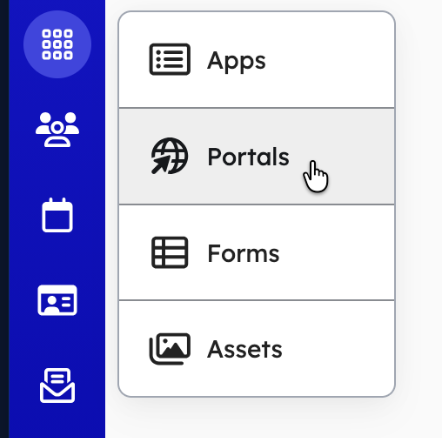
Inside your project, locate the Apps section in the left navigation and click Portals.
Step 10: Open the Default Portal
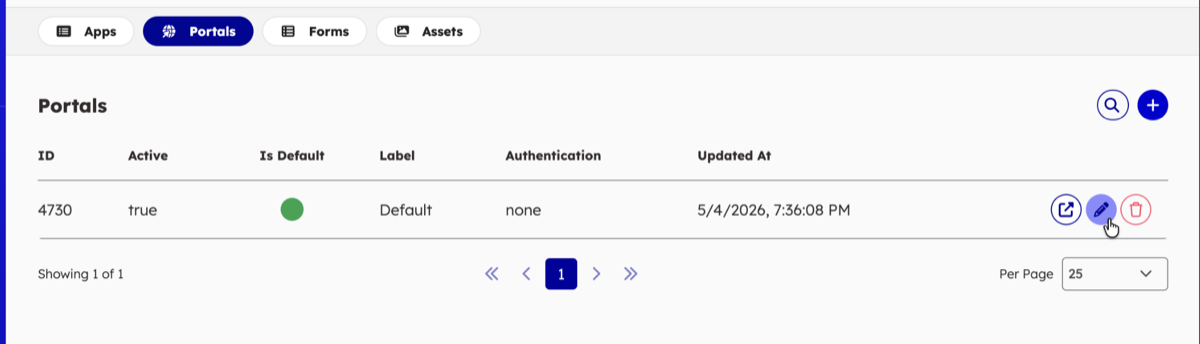
In the portals list, find the row marked Is Default (indicated by a green badge). Click the Edit button on that row.
If your setup uses a non-default portal (for example, a separate VIP portal), choose the appropriate portal instead.
Step 11: Open Advanced Settings
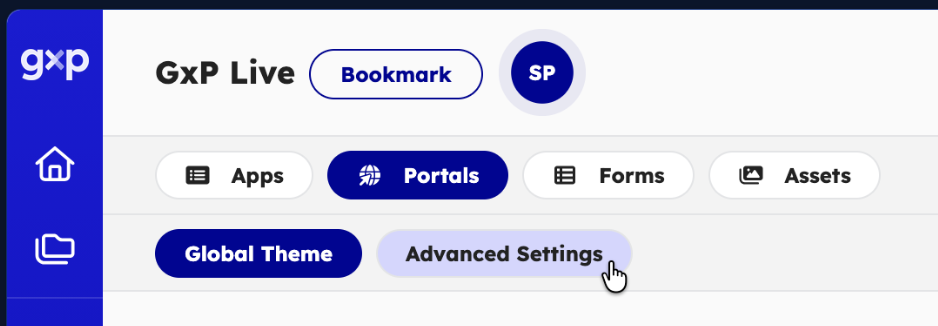
Inside the portal editor, click the Advanced Settings tab.
Step 12: Configure Attendee Authentication
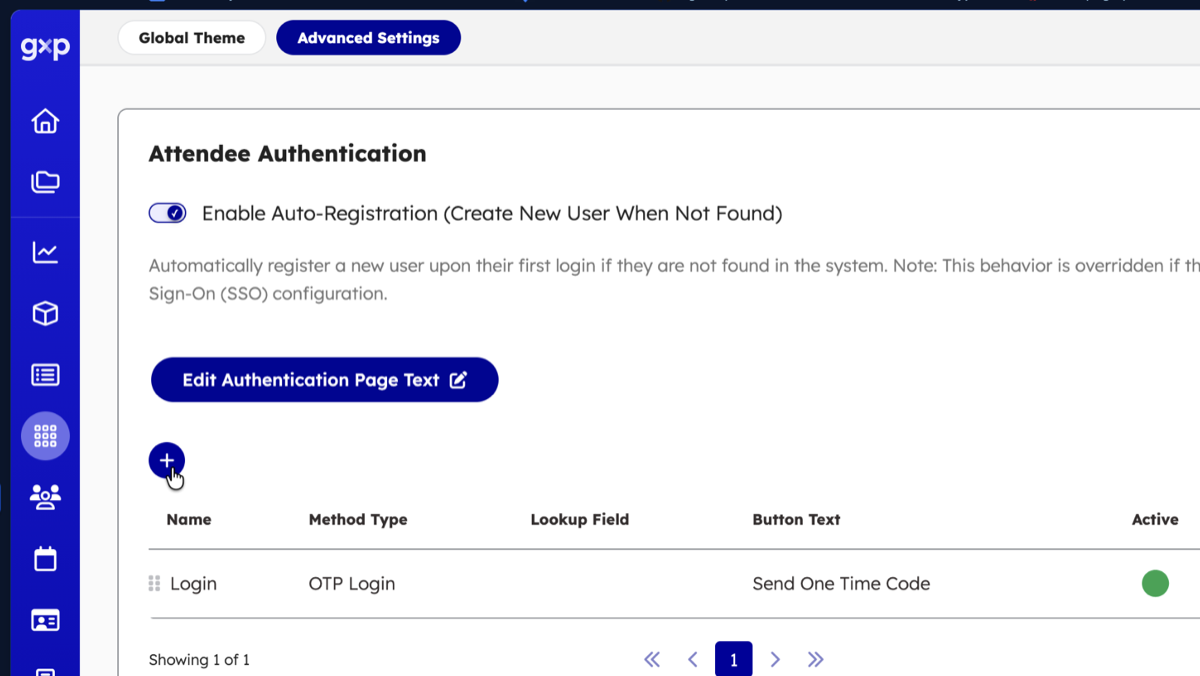
Scroll down to the Attendee Authentication card.
- If no authentication methods are configured yet, click the + icon to add a new method.
- If you're editing an existing method, click the edit button on the method row.
Fill in the authentication method fields:
| Field | Value |
|---|---|
| Name | A label for this method (e.g., Okta SSO, Company Login) |
| Authentication Type | Select SSO Login |
| SSO Configuration | Select the provider you created in Part 1 |
If the SSO configuration does not appear in the dropdown, verify that it is saved with the Active toggle enabled (see Step 8).
Step 13: Save
Click Save. The portal is now configured to offer SSO login.
Testing the Integration
To verify the setup:
- Open the portal URL in an incognito/private browser window.
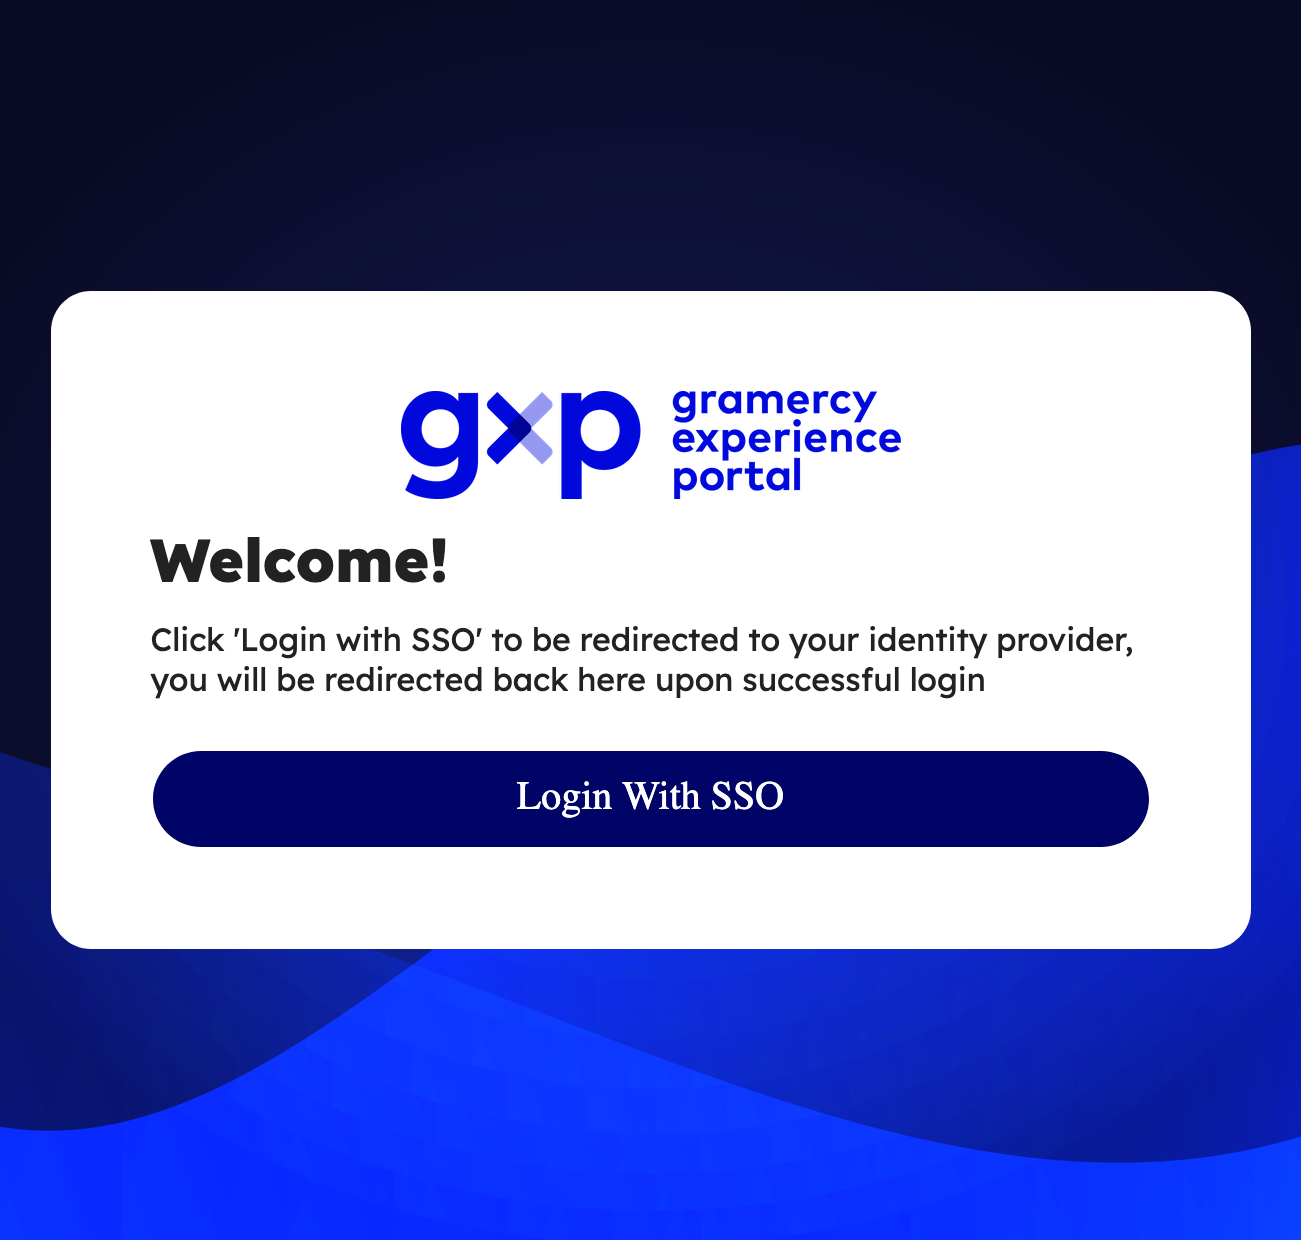
- The login screen should display a button with the text you configured (e.g., Sign in with Okta).
- Click the button — you should be redirected to your IdP's login page.
- Authenticate with valid IdP credentials.
- Upon success, you should be redirected back to the portal and logged in as an attendee.
Troubleshooting
SSO configuration doesn't appear in the portal authentication dropdown
Ensure the configuration is marked Active and saved. Only active configurations appear as selectable options.
Attendees see a SAML error after authenticating with the IdP
The most common cause is a mismatch between the ACS URL or Entity ID registered in the IdP and the values from GXP. Download the metadata file from the Metadata URL and re-verify each value in your IdP's application settings.
The login button doesn't appear on the portal
Confirm that you saved the authentication method in the portal's Advanced Settings. Clear the browser cache and reload the portal URL.
Certificate errors
IdP certificates expire. When your IdP rotates its signing certificate, update the IdP Certificate field in the GXP SSO provider configuration with the new certificate.
Field Reference
SSO Provider Fields (Team Settings)
| Field | Description |
|---|---|
| Name | Internal label — not shown to attendees |
| Description | Optional notes |
| User Type | Must be Attendee (Portal) for portal login |
| IdP Entity ID | Unique identifier URI for the identity provider |
| SSO URL | IdP's SAML 2.0 login endpoint |
| IdP Certificate | X.509 certificate from the IdP for verifying SAML assertions |
| Login Button Text | Text shown on the portal login button |
| Active | Must be enabled for the provider to be usable |
SP Metadata Values (Generated by GXP)
| Value | Used For |
|---|---|
| SP Entity ID | Registering GXP as a SAML audience in the IdP |
| Metadata URL | Importing all SP settings automatically into the IdP |
| ACS URL | Where the IdP posts successful SAML responses |
| SLO URL | Single logout endpoint |
Next Steps
- Apps, Portals & Widgets — Learn more about portal configuration options
- Portal Architecture — Understand how attendee authentication flows work end-to-end